

Appearance
Managing Vehicles
Add vehicles to your fleet, keep their details up to date, and control when they are available for bookings.
View vehicles
- Go to Vehicles.
- Review the list of active vehicles in your fleet.
- Use the search box to find a vehicle by registration or name.
- Open Filters to narrow the list by vehicle type, booking types, archived status, or compliance issues.
Compliance issues on the list
Vehicles with overdue compliance are highlighted on the list. Use the Compliance column to see whether a vehicle has issues. For full guidance, see Vehicle compliance.
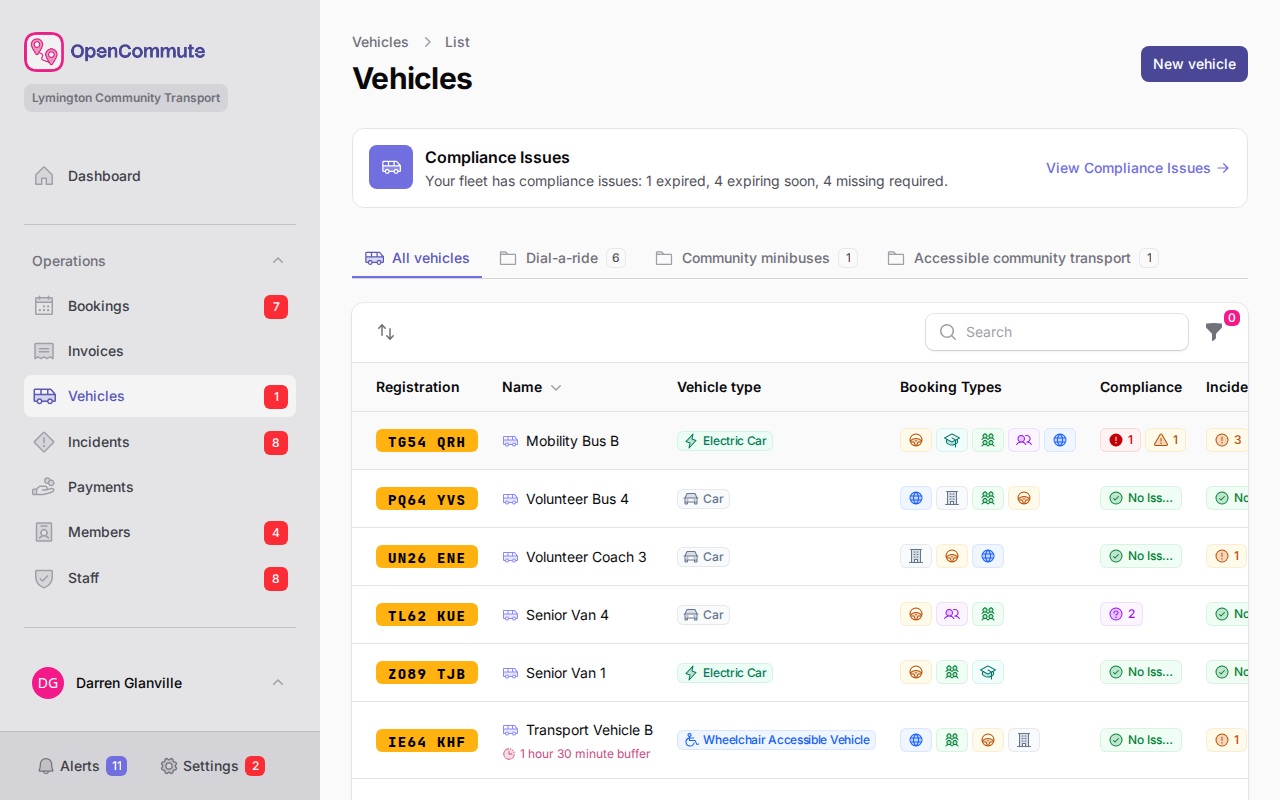 An example of the vehicles list showing fleet details and compliance status.
Add a vehicle
- Go to Vehicles.
- Click Create.
- Complete the required fields on the form.
- Click Create.
At minimum, enter Registration Number, Vehicle Type, and at least one Allowed Booking Type.
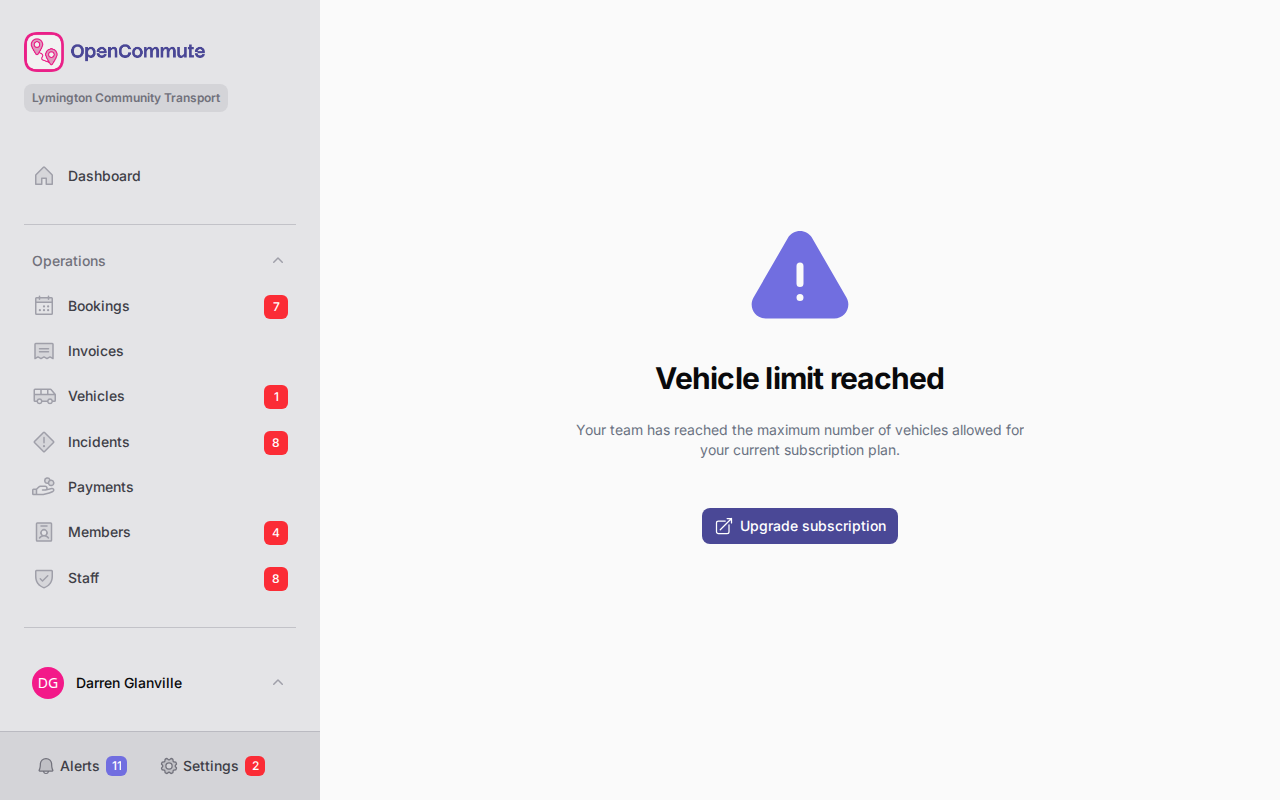 An example of creating a new vehicle with registration and vehicle type details.
Edit vehicle details
- Go to Vehicles.
- Open the vehicle you want to update.
- Stay on the Details tab.
- Update the fields you need.
- Click Save.
Basic information
Use this section for the registration, internal name, vehicle type, and seat capacity.
Licence and eligibility
Set Licence Type Required and choose which Allowed Booking Types this vehicle can be used for.
Scheduling and pricing
Set optional pricing overrides such as Hourly Rate (£), Daily Rate (£), and Mileage Surcharge (£/mile). To set or override the booking buffer, see Booking Buffers.
Notes
Add any internal notes your team may find useful.
Set home location
The Home location tab sets where this vehicle is based. It is used for mileage-based bookings such as driver own and group hire trips.
- Open the vehicle.
- Go to the Home location tab.
- Set the address on the map.
- Click Save home location.
When a vehicle has its own home location, it overrides the team default set in Settings > Updating Options > Vehicles tab.
To remove the override and use the team default again:
- On the Home location tab, click Clear override.
- Confirm by clicking Clear override.
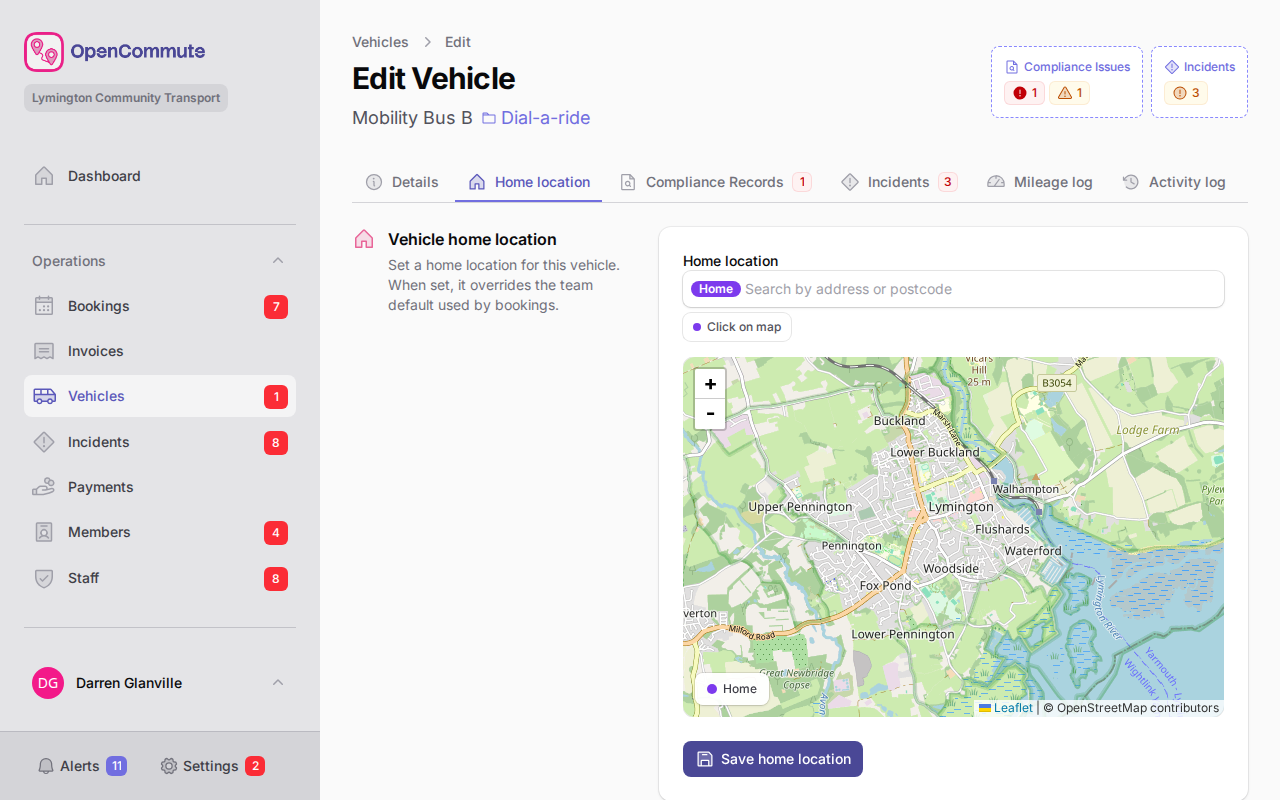 An example of setting a vehicle home location on the map.
One default for the whole fleet
Set the team default home location in Options first, then only override it on vehicles that start from a different place.
View mileage log
The Mileage log tab shows every mileage reading recorded for the vehicle.
- Open the vehicle.
- Go to the Mileage log tab.
- Review the list sorted by most recent first.
Each row shows when the reading was recorded, whether it came from a Booking or was added Manual, the odometer reading, miles travelled, and who recorded it. Click a booking reference to open that booking.
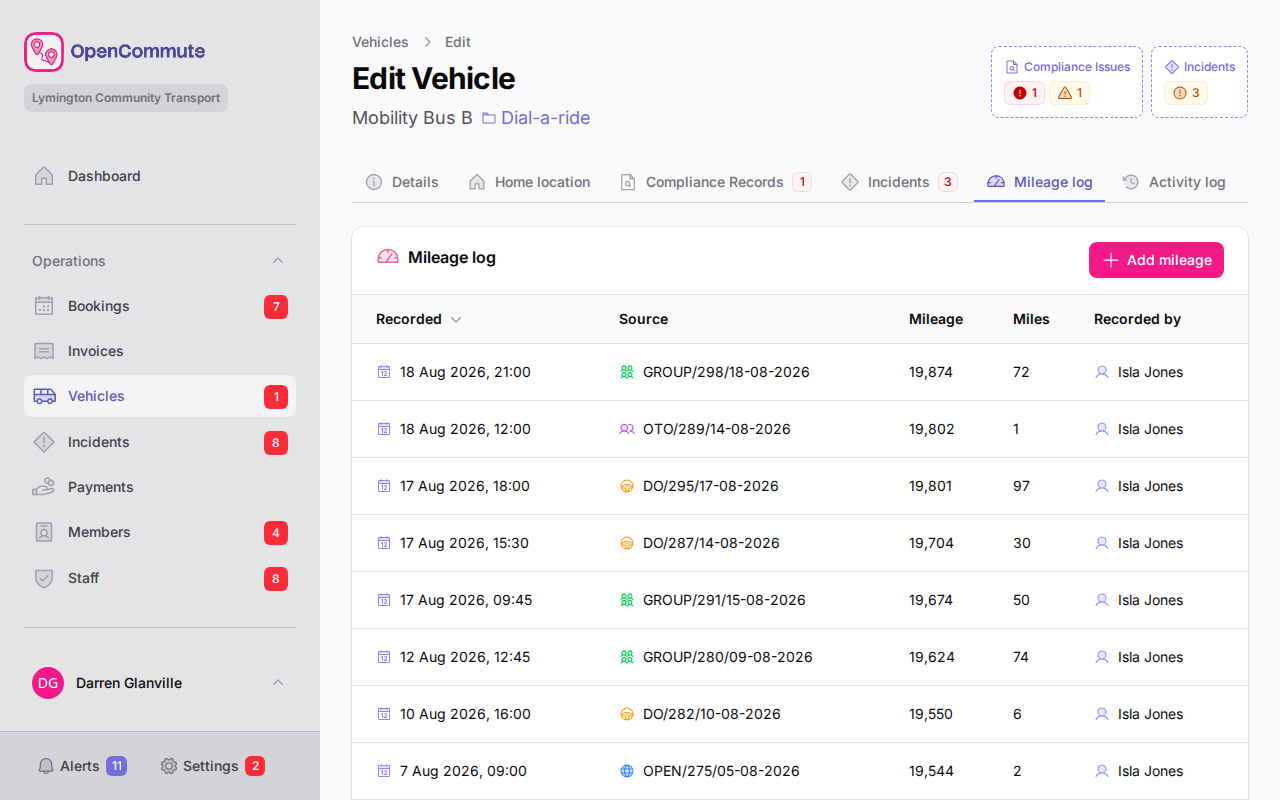 An example of the mileage log showing booking and manual entries.
Add manual mileage
Use manual entries when you need to record an odometer reading outside a booking — for example after a garage visit.
- On the Mileage log tab, click Add mileage.
- Enter the Mileage reading — it must be equal to or greater than the latest reading shown in the hint.
- Set Recorded at to when the reading was taken.
- If prompted, confirm that adding this reading will reset mileage alerts on related bookings.
- Click Add mileage.
Booking mileage is recorded separately
End mileage on completed trips is entered on the booking Details tab. Those readings appear here automatically. See Mileage and Invoicing.
Archived vehicles
If a vehicle is archived, a warning appears at the top of the page. Archived vehicles stay in your fleet list but cannot be used for bookings. Restore the vehicle from the Options tab when you want it available again.
Archive a vehicle
Archive a vehicle when you want to keep it on record but stop it being used for bookings.
- Open the vehicle record.
- Go to the Options tab.
- In Archive vehicle, click Archive vehicle.
- Confirm by clicking Archive.
To make the vehicle available again, click Restore vehicle in the same section and confirm.
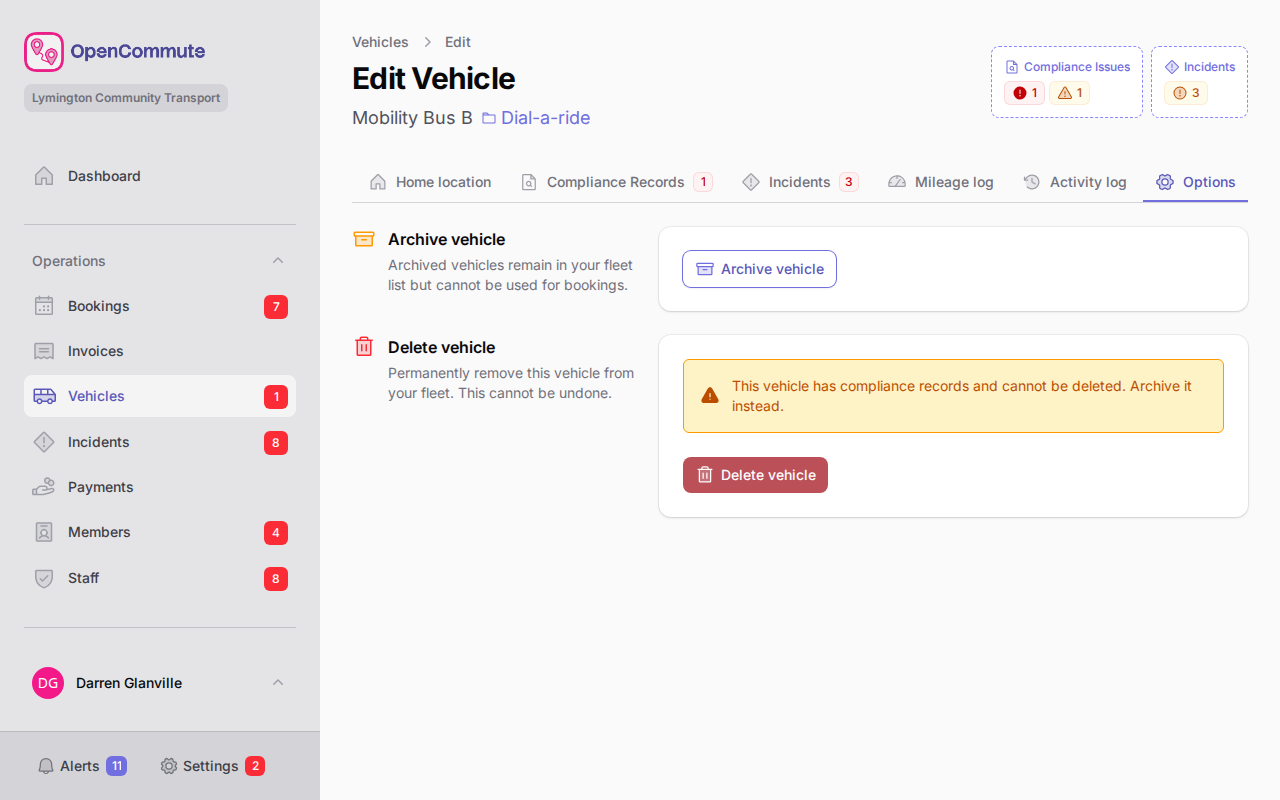 An example of archiving or restoring a vehicle from the Options tab.
Prefer archive over delete
If a vehicle has compliance records, you cannot delete it. Archive it instead so your history stays intact.
Delete a vehicle
Only delete a vehicle when you are sure you no longer need it.
- Open the vehicle record.
- Go to the Options tab.
- In Delete vehicle, click Delete vehicle.
- Confirm by clicking Delete.
Compliance records block deletion
If the vehicle has compliance records, Delete vehicle is disabled. Archive the vehicle instead, or remove compliance records first if your process allows it.
If a vehicle has already been deleted, open it from the list and use Restore vehicle or Permanently delete on the Options tab.
Activity log
If your role allows it, you can review changes to vehicles and their compliance records.
- Go to Vehicles.
- Click Activity log in the side menu.
List columns
These are the columns available and a small description of each one.
| Column | Description |
|---|---|
| Registration | The vehicle registration number. |
| Name | The internal name or description. Archived vehicles show Archived here. Vehicles with a buffer override show it under the name — see Booking Buffers. |
| Vehicle Type | The type of vehicle, such as minibus or car. |
| Booking Types | The booking types this vehicle can be used for. |
| Compliance | Whether the vehicle has expired, expiring, or missing compliance records. |
Related guides
- Vehicle Compliance — MOT, tax, insurance, and other checks
- Mileage and Invoicing — end mileage on completed bookings
- Updating Options — team default home location
- Driver Own Bookings — mileage-based hire using vehicle home
- Group Bookings — organisation hire using vehicle home