
Appearance
Roles and Permissions
Control what each person can see and do in your team. Start with a Role to give them a standard level of access, then add extra Permissions on individual users when someone needs a little more than their role allows.
Roles first, permissions second
A user's role sets their baseline access. Any permissions you add on their user record are extras on top of that role — they do not replace the role.
Default roles
Your team starts with three roles. Pick the one that best matches what each person needs to do.
| Role | Description |
|---|---|
| Admin | Full team management — users, vehicles, bookings (including cancel), settings, alerts, and audit logs. Can remove users and vehicles. |
| Manager | Day-to-day oversight — manage users and vehicles, create and cancel bookings, and review audit logs. Cannot delete users or vehicles. |
| User | Day-to-day work — view and update vehicles, and create and edit bookings. Cannot cancel bookings. |
Keep at least one Admin
Every team must have at least one Admin. You cannot change the last Admin to another role until another Admin has been assigned.
Billing is separate from roles
Subscription and billing access is managed through the billing contact, not by ticking permissions on a user. The billing contact is usually an Admin or Manager who has been given billing responsibility. The billing contact can also raise and manage support tickets. Everyone can search the knowledge base.
Cancelling bookings
Cancelling a booking uses the Delete booking permission. Admin and Manager have this by default; User does not. See Block Bookings for the cancel steps.
Assign a role
Give someone their baseline access when you invite them or when you edit their user record.
When inviting a user
- Go to Settings.
- Click Platform Users.
- Click Invite user.
- Enter their email address.
- Select a value in Role.
- Click Invite.
For the full invite flow, see Managing Platform Users.
When editing a user
- Go to Settings.
- Click Platform Users.
- Open the user you want to update.
- On the Details tab, select a value in Role.
- Click Save.
The user's role appears as a badge in the Platform Users list.
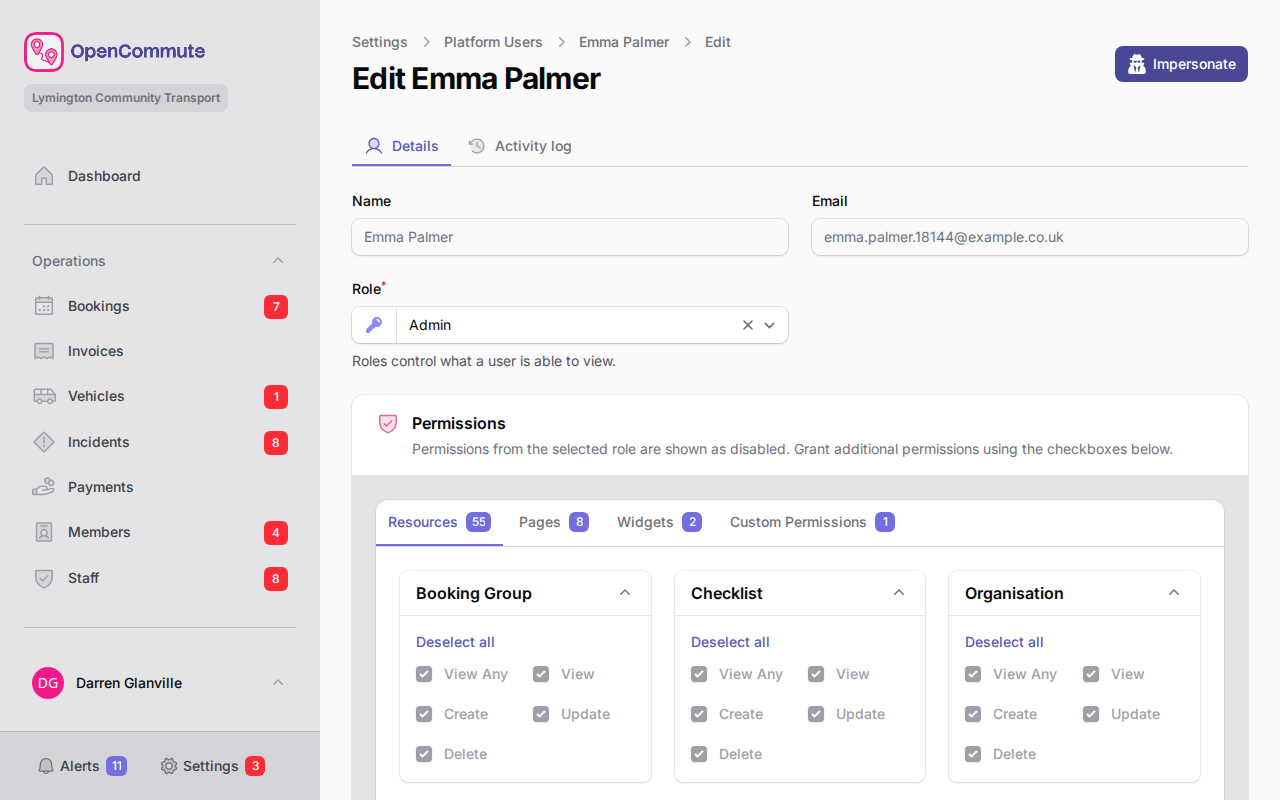 An example of a user record showing the Role field and Permissions section.
Add extra permissions
Use extra permissions when someone needs access to something their role does not include — for example, letting a User cancel bookings without making them a Manager.
- Go to Settings.
- Click Platform Users.
- Open the user you want to update.
- On the Details tab, confirm Role is set correctly.
- Scroll to the Permissions section.
- Open the tab you need — Resources, Pages, Widgets, or Custom Permissions.
- Tick any extra permissions you want to grant.
- Click Save.
Permissions that already come from the selected role appear ticked but cannot be changed here. Only the extra permissions you add on the user record are editable.
Permissions follow the selected role
If you change Role, the permissions section updates to match. Role permissions stay locked; you can still add or remove extras on top.
Permissions apply to this team only
Roles and extra permissions apply within the current team. If someone belongs to more than one team, their access can differ in each one.
Related guides
- Managing Platform Users — invite platform users, approve join requests, and review user status
- Changing Billing Contact — transfer subscription and billing access
- Updating Options — team settings (Admin access required)
- Block Bookings — create and cancel block bookings