

Appearance
Block Bookings
Block bookings reserve diary time on a vehicle so the slot cannot be used for customer trips. They are non-invoiced and require a reason when created.
Booking lifecycle
The diagram below shows what happens from creating the block through to completion. Click the diagram to zoom in.
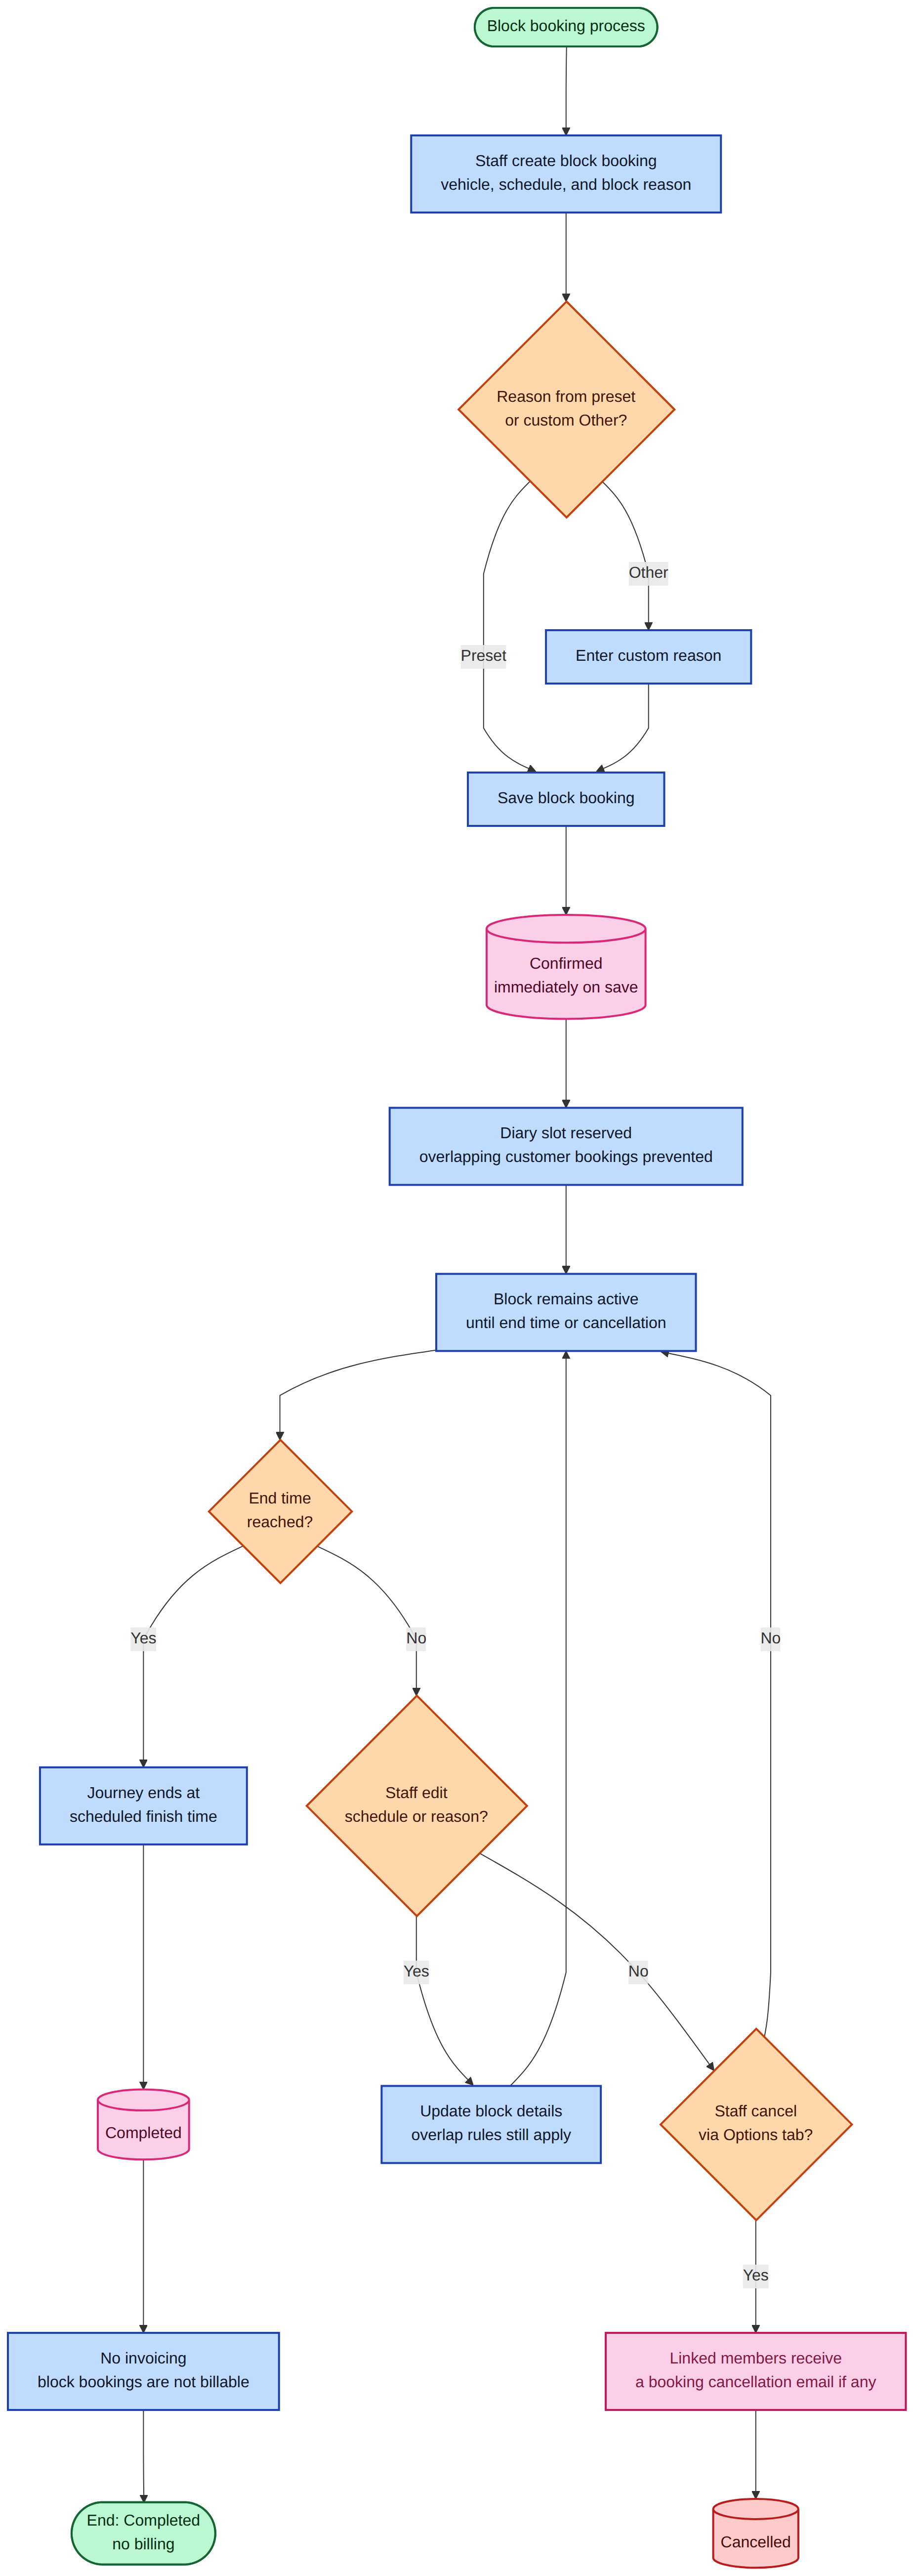
The block booking lifecycle from creation through to completion.
Create a block booking
- Go to Bookings.
- Click New booking on the list or calendar view.
- Select Block as the booking type.
- Choose the Vehicle, set the Schedule (date plus start and end times), and pick a Block reason.
- Select a Block reason from the preset list, or choose Other and enter a custom reason.
- Add optional Notes, then save.
You can also create a block booking from the calendar:
- Open the Calendar tab.
- Click a time slot, or click and drag to select a range on a vehicle row.
- The new booking form opens with the vehicle and times prefilled. Change the type if needed before saving.
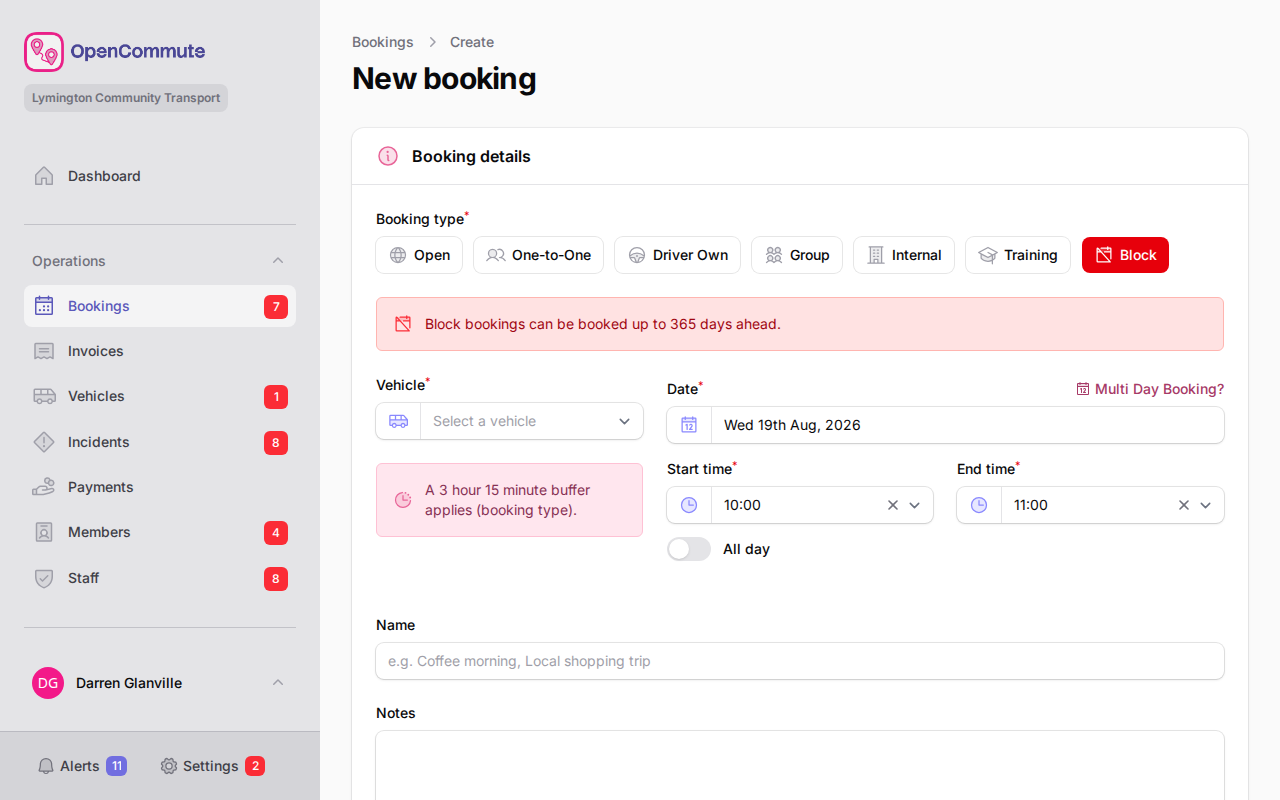 An example of creating a block booking with a preset reason.
Edit or cancel a block booking
- Open the booking from the list or calendar.
- Update the schedule, reason, or notes on the unified booking form.
- To cancel the block, open the Options tab and click Cancel booking. The notice then shows who cancelled it. Other cancellation reasons are listed in Managing Bookings.
The booking type is fixed after creation and cannot be changed on the edit page.
Manage reason presets
Team admins can configure common block reasons in Settings → Options → Bookings → Block booking reasons.
Include Other in the preset list if you want staff to enter custom reasons occasionally.
Overlap prevention
The system prevents saving a booking that overlaps another active booking on the same vehicle. Back-to-back bookings are allowed when the effective buffer is None — one booking can start exactly when another ends. Cancelled bookings are ignored when checking overlaps.
For team and vehicle buffer settings, see Booking Buffers.